


Guide status: INCOMPLETE, but all Robot Master stages are done!
Mega Man 7! Oh yeah, this is a good one. It's probably my second or third favorite Mega Man, and I replay it all the time. Over the years, I developed my own way of playing. Normally, you'd play a Mega Man game in order of boss weaknesses, however, I developed a route where you collect every item without ever having to play a stage twice or visit the shop. Plus, I discovered a very special technique...
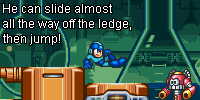
This tip comes first and foremost because I deem it to be a real game changer. There are a few jumps in the game which Mega Man normally shouldn't be able to make without power-ups, but if he slides to the very edge of the platform he's on and jumps just before his hand goes fully over the ledge, he can get a little extra distance and make them. This is especially useful in the first few stages, before he has access to the Rush Super Armor. The timing can be a little tight, but if you get good at it, you'll be able to reach items earlier and beat stages faster.
Now, onto the game!
Not much to say here. The opening cutscene is unskippable, so either read it or grab a snack. Just be sure to get me one, too. Basically, Mega Man is all like, "I can't believe that the robots Wily built to break him out of jail have broken him out of jail! I'm gonna smoke that jerk once Dr. Light finishes that upgrade for me and Rush!" So yeah, same old same old, Mega Man has to go handle Wily for the 7th time (Or like, the 15th time, if you want to be pedantic). The stage itself is super straightforward, but on the first screen, there's a pretty good spot to practice slide jumps. There's a very small drop in the ground right after the first Metall (yellow helmet guy) which you can just barely jump over with a near-perfect slide jump, and you won't fall to your death if you fail. On the second screen, you'll battle with a miniboss who's already falling apart. It'll send its mohawk blade (somebody watched Dragon Ball) rolling along the floor, so jump over it and shoot its head a few times to scrap it. At the end of the stage, you'll battle Bass, but the outcome doesn't really matter and only affects the following dialog. All he does is jump straight up and shoot anyway, so it should be easy for you, champ.
Now onto the stage select. This game is noteworthy for only letting you choose from four stages initially. Also, there's a shop! Press the Select button to visit Big Eddie's, where you can give bolts to Auto in exchange for items. When you visit initially, he'll complain about having misplaced his Hyperbolt, whatever that is. We'll keep an eye out for it and get back to him later. For now, go back to stage select so you can, well, select a stage. First up:
The timer platforms count down whenever you stand on or walk into their plungers and explode after zero. The blast radius isn't very big, so it's easy to escape harm. Grab the 1up on the second screen if you're skilled with slide jumps, then jump back to the path with the timer platforms and fall through them to get an E tank. On the next screen, deploy Rush Coil onto the spikes to the right of the first timer platform and jump up to the platform above the water to grab another 1up. Cha-ching!
When you make it to the crab miniboss, just spam shoot. It'll shoot bubbles at you, but pellets beat bubbles. Jump the energy blasts and slide under it when it lunges at you and when it jumps back, then stand where it is as it explodes to collect whatever item it drops (if any) before you start floating upwards upon its defeat.
Stick to the left half of the screen to avoid the spike ceiling and dodge the bubble mines to surface safely. You'll jump onto a ledge where you have two options. A) wait for the water to rise back up and swim over the spikes, or B), slide jump over them. You can probably guess my preferred method. Go have fun with some vanishing blocks, then be sure to grab the R plate in the room with all the spikes and water.
Boss time. Burst Man attacks with bubbles and bombs, two things which burst, I guess. His yellow bubbles can bounce you around, his purple bubbles contain bombs and he can summon bubbles from the ground which can lift you up, which is bad once you realize that there are insta-kill spikes on the ceiling. If a purple bubble touches you, you'll get caught inside and float up into the spikes. Wiggle the D-pad and/or shoot rapidly to break free. The bomb will also fall out and explode. His bombs don't hurt you via contact, but they explode after a few seconds of flashing. The blast radius is very small though, even smaller than it looks, so they're not much of a threat. I say spam him with charge shots. That makes him spill bombs everywhere, so watch out for those. Get Danger Wrap for beating him, or for $2.49 at participating Taco Bell locations.

Whoa, already? Yes! We're deviating from the normal order already. I usually play Cloud Man second, but why not get Freeze Cracker first so we can actually see the cool gimmicks they put into that stage? Since you don't have his weakness yet anyway, you could even play Freeze Man first, but Burst Man is just easier overall.
At the end of the first screen, defeat the polar bear, then slide jump off the edge of the platform onto the next screen. If you hold up and right as the screen changes, you can skip the whole next screen by grabbing the ladder immediately. It's a nice little time save and it skips an utterly pointless room. When you get to the first screen with the flying shield guys, you can slide jump over the first one with good timing, and you have just enough room to slide right under the second one to get to the ladder.
That brings you to the icicle room. You'll have to wait for the stalactite guys to drop their icicles to use as platforms to get across some slide jump-proof spike pits. Yes, these jumps are specially engineered so you can't slide jump over them. The developers made it this way because they hate me specifically. Anyway, at the end of that screen, you'll want to go up at the fork in the road. Use Rush Coil to get onto the ice platform, but be fast, as it'll break if you stand on it for more than like a second. Up the ladder, you'll find the H plate. Use Rush Coil again to jump to the right ice platform and use a most beautiful slide jump to help with the tight jump up to grab the plate. Careful, these platforms don't respawn unless you die or leave the stage. If you mess up, well, there are spikes back the way you came.
After the room with the Sniper Joe (green guy with shield), you'll fall into a room with the floors iced over. Take the top path, utilizing a few most excellent slide jumps, and find Rush Search at the end. We'll be using that in a bit. Charge a shot, then jump down to the left and fire it at the orange thing to stun it. Jump up to shoot the green turret and make your way right. On the next screen is another polar bear, which you could skip right over... buuuut it has an E tank behind it, which is worth fighting for. Careful, this bear can drop icicles. After that, dodge the bomb sleds and summon Rush Search over the frozen dinosaur skull in the ground before the boss door. He'll bark and dig up the exit item, which will let you freely exit any stage you've previously beaten... even though you shouldn't have to revisit any stages if you follow this guide.
Boss time. Once you enter the room, don't move. Freeze Man will burst from his ice tomb, then continue to beckon you for all of eternity until you touch the controller. This isn't part of the strategy, it's just kind of amusing. So, Freeze Man has some tricky moves, and since we don't have his weakness yet, you'll have to get used to them. First, he'll shoot a projectile forward that freezes you. Then, he'll throw an ice ball at the floor, which will make it slippery and freeze your feet in place if they're hit by the wave. Then, he'll summon icicles which will fall from the ceiling. He'll then restart the cycle. If you're not alert, he can make quick work of you, but he does have one big weakness—he jumps whenever you shoot. Normal shot or charge shot, he's jumping for joy. I usually wait for him to get close, then unleash a charge shot point blank. He'll jump, but not quick enough to avoid the blast. It can be a lot to manage, but if you dodge his frozen freezing freeze attacks and exploit his jumping, you can defeat him and get his Freeze Cracker, which can freeze crackers, among other things.

At the end of the first screen, you'll see what I can only describe as a robot lollipop ghost. Shoot it to make it start raining. Actually, if you manage to jump past it without shooting it, it will rain anyway, so... pick your poison. On the next screen, there will be a 1up above you which you can get with either Rush Coil or a slide jump. There will also be another lollipop ghost, which you should shoot with the Freeze Cracker. Now it will start to snow, which will make some previously invisible platforms ahead clearly visible.
You'll make it to a room with the aforementioned previously invisible platforms, which are now covered in snow. You'll see a ladder above you, which you can reach with Rush Coil. Climb up to see a 1up to your right, and if you head left, you'll see more platforms you can jump across to collect the U plate. You can go back to the ladder and climb down, or jump down anywhere to return to the screen below and hope you don't plummet straight into a pit.
The next screen is a room containing a Sniper Joe. Take him out and climb the right ladder for a big energy capsule, then you can use Rush Search where the capsule was and he'll dig up a giant bolt worth 100 bolts. After climbing the left ladder, you'll see a ladder above you. Jump up with Rush Coil to find the fan favorite Proto Man, who will tell you a great way to piss off a park ranger. It's important that you don't skip this meeting, even if you don't need his advice, because it counts towards getting a special item later. Be warned, though, if you turn the game off and continue with a password, it won't remember your meetings with Proto Man, so if you want the reward for doing so, don't quit the game until you've gotten it, because the reward itself will save with the password.
After the room with the two ladders and the bolt, you'll come to an outdoor area again. This is a very special area, because you can grind to 999 bolts in no time at all here. Oh... I forgot to mention that bolts are this game's currency. I usually don't end up needing the store, but they do sell E tanks and 1ups, among other useful things, so it's good to have bolts. The method is simple, just approach the ledge to the right with a fully charged shot readied, and one of those bird enemies will drop its egg. The little birds will come out, and as soon as they do, while they're still concentrated in one spot, shoot the charged shot. That will take them all out in one fell swoop, and most if not all of them will drop an item. Most of them will be bolts, but you can even find 1ups if you're lucky. Walk to the left and back and the bird will respawn. It took me around 3 minutes to max out my bolts at 999, plus I recovered all my heath and got at least one extra life. Anyway, make your way across this screen with more birds and bootleg Air Mans to get to the boss door.
Boss time. Cloud Man is a joke if you use his weakness, Danger Wrap, which I suggest you do. There's no point in even going over his moves, since you can stun lock him as soon as the battle begins and blow him up before he has a single chance to attack. Shoot Danger Wrap at him when the battle starts, then he'll rise back up. About half a second after he reaches the top of his ascent, he'll stop flashing and you can shoot another Danger Wrap at him, and he'll go back down. Rinse and repeat. If you miss, he'll shoot lighting at the floor, but it's easy to avoid, so avoid it and Wrap him in Danger some more. Easy Peasy, and the Thunder Bolt is yours.

Enter this stage with at least one extra life. At the start of the stage, you'll be standing under some giant Nintendo Famicoms. If you use Rush Search under the first one, you'll dig up a Game Boy! You can't collect it, unfortunately, but it's cool to see. Anyway, the stage is pretty straightforward until the room after the elevator section. you'll see lava or molten metal or something, which can be frozen with the Freeze Cracker. We'll come back to this in a moment. Proceed as normal into the room with the room up the ladder with the generator under the "AC 100V" sign. Shoot it from the left with the Thunder Bolt to activate the lifts in the correct direction, then get out of the way immediately or else be crushed by the one right above you.
Climb the screen using the lifts to reach Rush Jet, then allow yourself to be crushed by a lift. This will send you back to the checkpoint, the room with the lava, so you can get the other items in the stage in one go. Freeze the lavafall and it'll crumble. Walk through the wall behind it to find a secret ladder leading down. Freeze the lavafall to the left of where you fall down and grab the S plate behind it. Congrats! You're now the proud owner of the Rush Super Adaptor, which is a nice blend of the Rush Jet Adaptor and the Rush Power Adaptor from Mega Man 6. With this adaptor, you can get an extra boost for your jumps and shoot your fist as a powerful projectile when you charge a shot.
Plate collected, go to the right, freezing the lava by angling Freeze Cracker downwards to make your journey less treacherous. You'll make it to the right side of the screen and see a ladder up. Before taking the ladder, you can use Rush Search in the middle of this room to get another giant bolt, y'know, if you didn't get enough in Cloud Man's stage. Now, go up the ladder and collect the 1up behind the flying turrets, which will make up for the one you lost a moment ago. Keep moving ahead, and once you get to the room with the floating green and orange platforms, it's time to break out your Rush Super Adaptor. It'll make traversing this part a lot easier. Shoot the blocks that land on them and hop across, making use of your extra boost. At the end of the next room, you'll find the boss door.
Boss time. Junk Man, like Cloud Man before him, is completely crippled by his weakness, Thunder Bolt. Shoot one at him as soon as the battle starts, and he'll retaliate by jumping over you and throwing some junk down at you midair. Slide out of the way of it and zap him again. Rinse and repeat for an easy win. Enjoy his Junk Shield, which is what I call my underpants.
After Mega Man and the good doctor have a chat about Bass, Light sees that the robot museum is under attack. Who you gonna call? Blue Bomber!
The stage isn't really a stage, it's just a cameo-fest with a boss at the end. Enjoy the musical mashup of past Mega Man tunes and check out the familiar faces in the background, including not one, but two Plant Mans. Walk straight to the boss door.
Boss time. Wily will smash through the ceiling and fly off with the body of Guts Man, then send in a fat clown, no relation. Its head is its weak point, specifically when it isn't spinning. You'll want to blast it off with a shot from basically anything (I just use a standard pellet shot), then when it's on the ground, attack it with Danger Wrap. If you hold down on the D-pad while firing it, it will drop a mine in front of you instead of shooting the bubble bomb. The regular bubble bomb will still hit it if you're right next to it, though. A few of those and you're onto the next four Robot Master stages.
Real quick, let's take stock of your items so far. You should have all four Rush plates, and therefore the Rush Super Adaptor, Rush Jet, Rush Search, the exit item and two E tanks, if you managed not to use those. There's a lot more to find, so get ready! Need another snack break yet?

It's Turbo Time! This is another boss we're going to fight without its weakness, but his moves aren't so bad. The stage starts with a Sniper Joe on a tractor coming up from behind you. You have to defeat it, so don't just run away. For whatever reason, you can't go into the wide open entrance to the building unless this Sniper Joe is no more. Maybe there's a forcefield. It's not too tough, so just beat it before you get squished.
Climb up to the room with the tires being carried along the ceiling. These tires will bounce you around, so I like to equip the Rush Super Adaptor to help catch myself if I get pushed off a ledge. You'll see a part of the floor that's 3 giant tires stacked on top of each other between two yellow posts. The tires are empty, so be careful not to fall down the middle of them. If you do, you'll have to fight another tractor and go back to the second screen. Use Rush Super Adaptor to get over it easier.
Keep the Super Adaptor equipped. Climb the ladder at the end of that screen and take out the tire enemy on top of the stop light to your left, or leave it alone and climb high enough on the ladder that it takes itself out. Drop off the ladder and use the Super Adaptor's boost to get to the platform the enemy was on, then deploy Rush Search to find an upgrade for the Super Adaptor's charge shot. Now it has better range and homes in on enemies. Sweet! On the next screen, drop off the ladder through the yellow part of the right wall to find a secret room where you'll meet Proto Man again, who will tell you something you already knew.
There's nothing notable in the next room, except for a giant bolt buried in the ground where the blue X is. Rush Search will gladly dig it up if you need it. Either way, you should take off the Super Adaptor here. Now onto the most annoying parts of the stage, back to back. Both are homages to previous Mega Man stages, and both are a huge pain. First is the room with the fire blocks, a-la Mega Man 1's Fire Man. You'll have to watch the countdown timers on the blocks, walking and sliding at the right times to avoid damage. You can also use Freeze Cracker to turn the fire pillars into solid ice pillars, but I always take a few hits here regardless. Next is the insta-kill fire beams shooting from the walls a-la Mega Man 2's Quick Man. Just keep falling down and collect the E tank on the right side if you can. I don't think you can freeze these.
If you managed to survive the previous rooms, you'll fall down onto a truck's trailer. Go to the right, and boom, now you're fighting the truck. Dodge its missiles and shoot its eyes, preferably with Thunder Bolt, to defeat it. Once it crashes, walk to the next screen, which contains the boss door. If you're like me and the previous few rooms have you low on health, you can save your E tanks and just walk back and forth to respawn enemies and farm health.
Boss time. Turbo Man's three moves are as follows. First, he'll jump up and throw a wheel of fire at you. Hug the wall, then when he throws it, slide under it, and then as it climbs the wall, slide back to the wall underneath it. the fire will fall away from the wall and you. For his next trick, he'll suck you towards him. Either slide away from him or nail him with a fully charged shot to end this move prematurely. Finally, he'll transform into a car and his tires will squeal as he prepares to ram you. When you hear the tires stop squealing and the motor start revving, get ready to jump. He'll do that twice, then start the cycle over. If you follow these steps, you'll total him without much trouble and earn the Scorch Wheel, but unfortunately, not the ability to turn into a car.

Mega Man, my dear Mega Man... Welcome... to Jurassic Park. No, seriously, just look at it. what else could it be? The only differences are that all the dinosaurs are robots, and there's no Wayne Knight. Unless... No, he's not a hidden miniboss, sadly. Anyway, start out by equipping the Rush Super Adaptor, as it helps a good bit with this stage. After you blast the stegosauraus, use your boosts to help you over the Super Mario Bros. 2 waterfalls.
Up the ladders, you'll find a sleeping robot Yoshi you can ride safely over the spikes. Use the Super Adaptor's homing charge shot to take out the oncoming enemies, and don't forget to jump onto the next Roboshi when the first one voluntarily jumps into a pit. Aboard the second one, jump onto the floating platform with the ladder above it, and boost up and to the right to grab an E tank, then jump back. Go up the ladder and beware the Sniper Joe just off screen to your right.
Up the next ladder, heed the warning on the signs, because you'll be attacked by a giant T-rex. Shoot at its jaw with charged homing punches. They won't home in on its jaw though, so you'll have to be fairly close and level with it. You can stand on the ground and hug the right side of the screen to avoid its pink energy balls, but when it's low on health it'll start shooting fire from its mouth, so you'll want to take higher ground to avoid that. Once it's dealt with, climb the ladder up.
Now you'll be in a forested area. Equip the Scorch Wheel, jump up into the canopy and burn it all down! This will take care of the hornet nests, and burning the last tree will reveal a hidden ladder. You'll find a caged bird, but it's not just any bird... It's Beat! Shoot the cage with a regular charged shot to free him. Unlike the previous games, Beat doesn't help you fight. Instead, he'll save you from pits you fall into. He'll do this up to four times, then you have to buy more ammo(?) for him from the shop. Also, for some reason, he's labeled "RS" in the menu. I can't even imagine what that stands for.
Go back down the ladder and continue right, fighting a few hatchling dinosaurs to get to the boss door.
Boss time. Slash Man is equally weak to Freeze Cracker and Scorch Wheel, but I tend to use Freeze Cracker because it has much better range, and you can even angle it up, which is helpful because Slash Man likes to cling to the walls. When you hit him with his weakness, he'll jump up through the ceiling and blobs of red goo will rain down. Dodge them, as they'll limit your mobility and make you unable to attack. Then, he'll soar down directly into you. Dodge him and retaliate with fire or ice. Rinse and repeat to beat him and take home the Slash Claw, which completes your Wolverine costume.

You'll start with a platform above you with a bolt on it, and a bunch of springs to your right. They won't bounce you high enough unless you're holding the jump button when you touch them, so do that and collect your prize before you go down. After a few rooms, you'll be in the one with springs on the walls and a 1up tucked away. You can hold the jump button go get more height on the wall springs as well, so once again, do that and and collect your prize before you head down.
Before long, you'll come to a room with springs on the ceiling which threaten you to bounce you downwards into enemies. Should you fall into them, those guys are easily dispatched with Danger Wrap. You can even push the bubbles around! However, you can use Rush Super Adaptor to make the jumps more easily. In the room right after that, you'll be on some steps. Use Rush Search on the middle step under the brightest star. He'll dig up a giant health capsule, which refills all your health. Then, in the very next room, uze Rush Search again on the floating platform if you need another giant bolt.
Now for the springiest room to ever spring springs in the Springtime. Go ahead and equip the Super Adaptor—you're gonna want it. We're going up top, so get onto the red block you'll see from the entrance. It'll shoot out a boxing glove in the direction its arrows are pointing when the arrows start flashing, so be careful you're not in the way. jump up to the left of the block. You can then bounce up the wall springs to get an E tank if you need it, then go up the path against the left wall. Collect the 1up and jump up and down on the red block next to you, and it will rotate 90 degrees counterclockwise with each jump. Get the arrows to point left at the suspicious wall, and the glove will punch through it. Avoid the spikes and grab the bolt on the ledge. That's not any old bolt, though, it's Auto's Hyper Bolt, which will give you a big discount on everything in the shop.
Back into the big spring room, your goal is the top right, so head there, using boosts and homing fists to make it less annoying. After two encounters with your buddy Sniper Joe, you'll be at the boss door.
Boss time. Spring man doesn't like the Slash Claw, so let him have it. Once hit, he'll jump to the center of the room, then jump up and throw two punches down at you. Dodge them, then slash him when he lands. Rinse and repeat for an easy win and the ability to use his Wild Coil. It's better than the Mild Coil.

First tip is that this stage has a cool easter egg. Hold the B button as you select this stage to hear a different level theme. If you're up on your classic Capcom games, you'll recognize the tune. It will only play if you haven't beaten the stage yet, just so you know. The standard level theme for this stage is really good, though, so it can be a tough choice. Anyway, onto the actual level.
The first screen contains a single crow-bot which will spit pellets at you, and it'll laugh and shake its butt at you if you get hit. The second screen introduces the zombie robots, which fall apart and die if they walk into a wall, so you can just let them take care of themselves. Down two ladders, you'll be in a room with green robotic suits of armor in the background. Look out, though, the 3rd, 5th and 7th suits have legally-distinct-Sir-Kibble-from-Kirby for heads. When you get close, they'll drop off and start attacking. Just inch close to the armor and start shooting once the enemies' eyes light up.
Climb up and watch out for bats and crushers on the way to the miniboss door. Said miniboss, a big pumpkin, isn't too tough—just keep your distance and slide under it when it hops across the room. However, this ghoulish gourd has a secret. There are two ways to defeat it, and depending on which method you use, a different path opens up. First, you'll want to defeat it by shooting its little pumpkin core when it opens its mouths, or outer layers, or whatever. After enough hits, it'll crash through the floor. Drop throigh and be prepared to dodge an attack from a Sniper Joe to your right. Dispatch him, then walk through the wall behind him to find... a boss door?
Behind this boss door is... nothing. Unless, of course, you met Proto Man in the Cloud Man and Turbo Man stages (again, these meetings aren't remembered if you quit and entered a password to continue), in which case, the man himself will drop in on you... but why is boss music playing? He'll give a speech that's just embarrassing to anyone who knows that Mega Man isn't supposed to know that Proto Man is his brother, then he'll get to blastin', and you'd better blast him right back if you want to win a neat prize. He has four moves: he can stand and fire three shots, he can charge and fire a huge charge shot, he can do two jumping shots then fire a shower of pellets, and he can dash straight forward with his shield out in front to cross the room. His shield deflects bullets, so keep shots charged and let them fly at the right times. You'll want to blast him when he's standing and shooting, when he's shooting his giant charge shot, and especially when he's jumping and shooting, because that will interrupt the move and prevent his bullet shower, which is hard to dodge. When you hit him with a charge shot, he'll do his dash, so just jump over that, rinse and repeat for his congratulations and his Proto Shield.
The Proto Shield is pretty cool, but it would be a lot cooler if it could be combined with other weapons or the Rush Super Adaptor. Anyway, it does what you'd expect it to do, and you can pretend you're a Sniper Joe from now on. Anyway, go down the ladder, and keep going down until you get to the dark room. Slide into the 1up and allow yourself to fall into the spikes. You will die and respawn outside the pumpkin's miniboss door, and this time, we'll take it out the other way and take the other path for the rest of the stage. To get this path, when the pumpkin's mouth is closed, attack its eyes. Once you beat it this way, it'll smash through the right wall.
Go through the next room and climb up the ladder. In this room, go left and continue to climb up. I recommend equipping Rush Super Adaptor and taking advantage of the homing punch to make it easier to climb up the ladders. Once you reach the top, you can jump off to the right wall and use the adaptor to get a boost and reach the 1up tucked into the wall. Regardless, climb up to the next room to proceed. This next room has a quirk I didn't notice for years. You'll see a wolf enemy when you first come up the ladder, and it's hard to kill. If you wait long enough, clouds will come and hide the moon, and the wolf will turn into one of the unicycle knight guys you've seen before. It might be worth waiting on the ladder for this to happen, since they take less hits to beat in that form.
Climb down the ladders to find yourself in a room containing a pretty vampiric portrait of Wily as its centerpiece. Is this hinting at a dark secret of the doctor's? Well, whatever the case may be, you'll want to use Rush Search under the painting to dig up the Energy Balancer. Whenever you pick up an energy capsule while you're unequipped or while your current weapon has full energy, this handy piece of kit refills weapons that are low on energy without you having to swap over to them. It's a real time-saver. With that grabbed, you should have eveything but some W tanks and an S tanks, unless you've bought some. Proceed in the stage to see Bass say a cuss word and buddy up to Mega Man, then walk straight to the boss door.
Boss time. Shade Man hates Wild Coils for whatever reason, so give him plenty. Shade Man will fly around up in the shadows, but you can hit him when he swoops down to grab you and suck your blood. Or, oil, maybe? Wild Coils can be charged, but you can also hold up on the D-pad to make them bounce higher. This basically means Dracula here isn't safe anywhere. He's kind of a wimp once you know this, so stake him in the heart and win his Noise Crush, which sounds like a genre of music that's either really good or really bad.
You'll then be treated to a scene of Light's lab in ruin as he and Mega Man learn the truth about Bass. I had a bad feeling about him ever since he said that cuss word. Now you can go to Wily's Fortress, but first, why not go shopping? Auto probably wants that Hyperbolt back, after all. Fork it over and he'll take 50% off all his items. Sweet deals! Anyway, you'd probably want to stock up on E, W and the newly stocked S tanks more than anything. I usually don't go for 1ups, but you can if you'd like. Once you're ready, it's time to storm the fortress.
To be continued...
E Tank (EN) - Restores all of Mega Man's health. Use from the menu.
W Tank (WP) - Refills the energy of one weapon of your choice. Use from the menu.
S Tank (SP) - Refills all of Mega Man's health and fully refills every weapon. Use from the menu.
Beat's Whistle (RS) - Allows Beat to rescue Mega Man when he falls into a pit. Activates automatically up to four times.
Exit Part (EX) - Allows you to exit any stage you've already beaten. Useful if you're going back for items you missed, etc. Use from the menu.
Energy Balancer (EB) - When you pick up weapon energy, and you either don't have a special weapon equipped, or your equipped weapon's energy is full, the energy automatically goes to your weapon with the least energy. Always active once obtained.
R U S H Plates - Collect all four to receive the Rush Power Adaptor, which lets Mega Man hit harder and jump further.
Hyper Rocket Buster (PU) - An upgrade for Rush Super Adaptor. Turns its charge shot into a homing attack.